


Easy DIY Budget-Friendly Wall Hanging Jewelry Organizer Using a Cork Board
Welcome to CraftyfyHub, your go-to source for diy crafts for beginners and creative diy projects at home! If you’re looking for a practical and stylish way to organize your jewelry without breaking the bank, this easy DIY budget-friendly wall hanging jewelry organizer using a cork board and thumbtacks is the perfect project. This diy craft is simple, affordable, and adds a chic touch to your space. Let’s dive into this diy easy craft that combines functionality with crafts to do at home!
Why Choose a DIY Jewelry Organizer?
At CraftyfyHub, we love diy ideas that are both practical and beautiful. This diy wall hanging jewelry organizer is a fantastic addition to your arts and crafts to do at home because it:
Saves Money: Uses affordable materials like a cork board and thumbtacks, keeping it budget-friendly.
Organizes Your Space: Keeps necklaces, earrings, and bracelets tangle-free and easily accessible.
Customizable: Allows you to personalize your diy craft to match your decor.
Beginner-Friendly: Perfect for those new to diy crafts for beginners or seasoned crafters looking for diy projects.
What You’ll Need for This DIY Craft
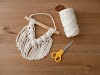
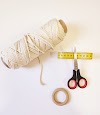
This diy easy craft requires minimal supplies, most of which you may already have at home. Here’s what you’ll need to create your wall hanging jewelry organizer:
Cork Board: A small or medium-sized cork board (available at dollar stores or craft shops).
Thumbtacks: A pack of colorful or metallic thumbtacks for hanging jewelry.
Fabric or Decorative Paper: To cover the cork board for a polished look (optional).
Glue or Double-Sided Tape: To secure the fabric or paper.
Scissors: For cutting fabric or paper.
Paint or Markers: To decorate the cork board frame (optional).
Hanging Hardware: Picture hooks or adhesive strips to mount the organizer on the wall.
Optional Embellishments: Ribbons, washi tape, or stickers for extra flair.
Cost Estimate: This budget-friendly project can be completed for under $10, depending on the materials you already own.

Step-by-Step Guide to Making Your DIY Jewelry Organizer
Follow these simple steps to create your diy wall hanging jewelry organizer and elevate your crafts to do at home game!
Step 1: Prepare the Cork Board
Choose a cork board size that fits your space (e.g., 12”x12” or 16”x20”).
If desired, paint the frame of the cork board with acrylic paint or decorate it with markers to match your room’s aesthetic.
For a polished look, cover the cork surface with fabric or decorative paper. Cut the material to fit the cork board, then secure it with glue or double-sided tape.
Pro Tip: Use a bold pattern like floral or geometric designs to make your diy macrame decor vibe pop. Visit CraftyfyHub for inspiration on decorating with macrame wall hanging styles.
Step 2: Plan Your Jewelry Layout
Lay out your jewelry (necklaces, earrings, bracelets) on the cork board to plan where to place the thumbtacks.
Space thumbtacks evenly to ensure your jewelry hangs neatly without overlapping.
For necklaces, place thumbtacks higher up to allow them to dangle. For earrings, place thumbtacks in pairs for easy hooking.
Step 3: Add Thumbtacks
Push thumbtacks into the cork board at your planned spots. Use colorful or metallic thumbtacks to add a decorative touch.
For heavier necklaces, use two thumbtacks side by side for extra support.
If you’re adding diy macrame elements, tie small macrame knots or cords to thumbtacks for a boho-chic look.
Pro Tip: Check out diy videos on YouTube or CraftyfyHub for diy macrame projects to add a macrame decor wall twist to your organizer.
Step 4: Decorate and Personalize
Add embellishments like washi tape around the edges or stickers for a fun vibe.
For a deep love macrame wall hanging DIY touch, weave a small macrame heart or tassel and attach it to the cork board with a thumbtack.
Consider labeling sections (e.g., “Necklaces,” “Earrings”) with small tags for extra organization.
Step 5: Hang Your Jewelry Organizer
Attach picture hooks or adhesive strips to the back of the cork board.
Hang your diy wall hanging jewelry organizer on a wall near your dresser, vanity, or closet.
Arrange your jewelry on the thumbtacks, looping necklaces and hooking earrings securely.
Pro Tip: Learn how to decorate with macrame wall hanging on CraftyfyHub to pair your organizer with other diy macrame wall art for a cohesive look.

Why This DIY Project Stands Out
This diy craft is a perfect blend of form and function:
Space-Saving: Keeps your jewelry organized and tangle-free.
Customizable: Adapt the design with diy crafts ideas like painted patterns or macrame decor diy accents.
Quick to Make: Can be completed in under an hour, ideal for easy macrame projects for beginners.
Versatile: Works for small or large jewelry collections and fits any room’s decor.
Tips for Success with Your DIY Jewelry Organizer
Start Simple: If you’re new to diy crafts for beginners, skip the fabric covering and focus on thumbtack placement.
Reuse Materials: Use an old cork board or leftover fabric to keep this budget-friendly.
Share Your Work: Post your creation on CraftyfyHub or social media to connect with other crafters.
Where to Find More DIY Inspiration
CraftyfyHub: Visit CraftyfyHub for diy projects and ideas, including diy macrame and crafts to do at home.
YouTube: Search diy videos on YouTube for tutorials on diy macrame wall hanging and other diy easy crafts.
Social Media: Explore Pinterest and Instagram for diy crafts ideas and macrame decor wall inspiration.
Wiki Resources: Check diy wiki for general tips on diy projects and crafting.
Conclusion
At CraftyfyHub, we’re passionate about crafts to do at home that are both practical and beautiful. This easy DIY budget-friendly wall hanging jewelry organizer using a cork board and thumbtacks is the perfect diy craft for organizing your jewelry while adding style to your space. Whether you’re a beginner or a seasoned crafter, this diy project is a fun way to explore diy crafts ideas. Visit CraftyfyHub for more easy macrame projects for beginners and start crafting today!

0 Comments